Bike Saddle Set Up & Adjustments for your Spiderflex REC
Saddle Set-up and adjustments for The Spiderflex Recreational saddle (REC), are designed to distribute the rider's weight properly and relieve pressure points.
Most riders will experience an adjustment period in switching from a conventional saddle to a hornless saddle, and in many cases, it is just a matter of getting more familiar with the ergonomic design of the Spiderflex REC saddle and getting some miles on it.
Each rider's saddle set-up is different, and the key is to find your balance between the saddle and the bars, now that the horn is removed.
With the horn removed, the ergonomic design of the Spiderflex REC allows the rider to distribute their weight more evenly, and reduce the pressure on the ischial tuberosities, or what is more commonly referred to in the cyclist world as the "sit-bones".
There are 3 adjustments to find the proper balance between the saddle and the handlebars.
1. Saddle height
Find your proper saddle height. Your leg should be 90 to 95% extended at the bottom of your downstroke.
2. Fore and aft position
Position the saddle to where your arms are in a natural and comfortable position on the bars. The closer you move the saddle forward, you transfer more of your upper body weight to the saddle, and off the bars.
3. Tilt adjustment
Tilt adjustment for your Spiderflex REC saddle is dependent on the type of riding you do. These tips are a guideline for your initial adjustment of the REC saddle. Fine tuning of the tilt adjustment will depend on your own individual style of riding.
Saddle Tilt Adjustment Specs
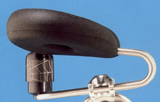
Cruiser Bikes & Hybrid Bikes
The majority of recreational riders, commuters, & bike path riders prefer an upright riding position.
Initial adjustment for this type of riding is to raise the front of the base to the point where the shock is straight up and down, giving the seat area a flatter stance.
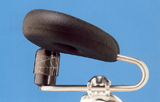
Road Bikes & Mountain Bikes
Road and mountain bike riders tend to transfer more of their body weight on to the handlebars while riding.
Initial adjustment for this type of riding is to have the base parallel with the ground, giving the saddle a slight forward angle.
Road Bike Saddle Set-Up
90% of our sales are to recreational riders, who are in a more upright riding position. That being said, we have customers using the Spiderflex REC saddle that are competing in Cat.4 and Cat.5 road racing events, so there is no question that a rider can adapt to a hornless saddle, and compete at that level.
This saddle is also heavy for road racers (680 grams). When we do sell to road racers, it is usually because of injury, and they are looking for a saddle that will totally relieve the groin pressure when they are riding. It's a matter of making the proper adjustments to suit your riding style on a road bike frame, and commiting to those adjustments, in order to get the health benefits a hornless saddle provides.
Each rider's set-up is different, and the key is to find your balance between the seat and the bars, now that the horn is removed. This adjustment period seems to take longer on a road bike frame because of the bars being lower than the seat height. Recreational riders, who are in a more upright riding position, seem to adapt to a hornless saddle much easier because of the higher handlebar set-up.
When switching over to a hornless saddle on a road bike frame, the higher you can get the handlebar height, the better. The higher handlebar height transfers your upper body weight back to the saddle, and off the bars. Now that your weight is transferred more to the saddle, the ergonomic design of the Spiderflex displaces your weight more evenly, while taking the pressure off of the perineum area.
Taking the pressure off your arms and hands can be achieved several ways. Your local bike shop can help on these adjustments.
- 1.Raising the bars - Spacers can be added, or you may be able to flip the stem over and raise the bars that way, or purchase either a stem with a higher angle, or an adjustable stem which will allow the angle of the stem to be changed.
- 2.Widening the handlebars will also help to reduce pressure on the hands. This can be achieved in several ways, or in combination:
- 1.Winged handlebars
- 2.Oversized handlebars
For any handlebar, you can place the cables on either side of the handlebar when you wrap your bars.
If you draw a line through the middle of the cables and handlebar, it should be parallel to the ground. It should look something like this -o-
The dash "-" represent the cables and the "o" represents the handlebar.
- 3.Moving the saddle forward, to transfer your upper body weight off the bars.
Please view our Road Bike Set-Up profiles below.
Spider Rider Profiles / Road Bike Set-Ups
David Fisher / Spiderflex REC / Set-Up / Fuji - Team Pro
Here is my method for setting the seat position on the Spiderflex REC. With a regular seat it is pretty much 1,2,3. First you put the seat in a horizontal position. Then you adjust the seat height so that your knee has a slight bend with the pedal in the 6 o'clock position. Next you adjust the forward/backward position so that your knee is in line with your foot over the pedal when the pedal is in the 3 o'clock position. That gets you relatively close to where one wants to be with minor changes to account for riding style, etc.
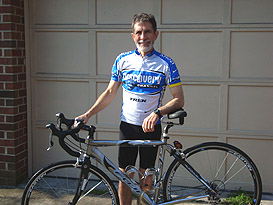
With the Spiderflex seat it is not so simple. You can't use anything previously determined from the old seat position. I start out putting the seat on with the rails parallel to the floor. From there I adjust the height and forward/backward position like a regular seat. Now the fun begins. With a regular seat everything is between your legs so there is no interference from the seat where the leg and butt connect. The Spiderflex is sort of like a chair and if the angle of the seat is not correct it will rub you in the bend between the butt and leg. This is how I determine the seat angle. It is trial and error and will generally take several rides to get this right. The less experience you have with the seat, the more time it takes to work this out.
Because of the angled seat position the torso is angled forward toward the bars. It becomes necessary to have the bars in a higher position than with a regular seat because you will be pushed forward, placing a lot of pressure on the hands. On my Fuji I have all the spacers in place and a stem that is angled up rather than down. I think that the bar position is extremely important to make this seat work. I do not think that it is unusual to make changes some weeks after you think you have it right. If one is patient the rewards are tremendous.
With a road bike the comfortable position for me is probably more upright than most would be used to riding. For the fitness rider I can't see this as a problem. I can still get into the drops and it doesn't feel awkward at all.
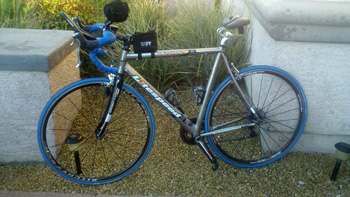 Mike "Frostbite SEAL" Benedict 2012 Furnace Creek 508 Cycling Race Report
This year's Furnace 508 was the culmination of 2 years of effort; 46.5 straight hours of peddling and 508 miles with no sleep this October weekend. First, thanks to my chase team whom I depend for my safety and care for many, many unwavering hours! Without pay and not much fanfare, you guys kept me going when I was exhausted and even hallucinating! Additional thanks goes to our seat sponsor Spiderflex; there is a back-story (literally) which had significant contribution to our success this year. We had a weekend full of anticipation, desert, exhaustion, mountains, bounce-back, heat, winds, more mountains, more desert, 2 cycles of daylight and night, and, finally, success! I am still trying to process the whole experience of the journey...spiritual is a little too cliché'.
To understand the 508 weekend for me, you need to understand a few tidbits of information. First, the Furnace 508 is known as "The Toughest 48 hours in Sport" (the solo time limit) and claims to be the world's premier ultra-distance cycling race. This 508-mile bicycle race is revered the world over for its epic mountain climbs, stark desert scenery, desolate roads, and its reputation as one of the toughest, but most gratifying, endurance challenges available, bar none. The course has a total elevation gain of over 35,000', crosses ten mountain passes, and stretches from Santa Clarita (just north of Los Angeles), across the Mojave Desert, through Death Valley National Park and Mojave National Preserve to the finish line at the gateway to Joshua Tree National Park, Twenty-nine Palms, CA. Solo, two-person relay, and four-person relay divisions are offered with an invitational field limit of app. 240 racers (app. 80 soloists and 60 relay teams). We were a solo entry.
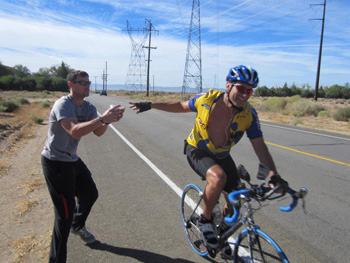
I participated in the 508 race in 2011 as a 508 soloist "rookie" and had a DNF at mile 350 on day two. The reason was not fatigue, but what can only be described a "terminal chaffing". To say there was a seating to anatomy injury would be an understatement as blood and significant recovery time was involved! Trust me; being a multi-Ironman, marathon, and Ultra-marathon running veteran, I would never bow-out of a cycling event for a little reason. This problem needed a REAL cure if I was going to return to this event the next year and succeed in 2012. I never leave a challenge unfinished!
My solution had a multi-pronged approach. First, finding different chamois (shorts) lubrication was on the agenda, changing shorts more often during this year's event would be helpful, but mainly, I needed an alternate design saddle to allow the pressure points to be better distributed. My online web-search led me to Spiderflex saddles, which was a stroke of pure luck!
I had numerous choices in these alternate design saddles and, after careful consideration on design and build-quality; I got on the phone with Doug at Spiderflex. He was extremely helpful from the first phone call. I received the saddle quickly and excitedly installed it that night. I was initially impressed with the finish and construction of the saddle. It is a little heavy compared to my "normal" design racing cycling saddles with titanium rails and little padding, but I was willing to exchange some weight for comfort, if the benefit is significant, which it was.
I worked the fit to find a position on the Spiderflex that worked best for me over the course of a training ride that next day. After a 1.5 hour climbing ride that morning (with lots of adjustments), I was largely comfortable after finding a course position. The Spiderflex saddle was particularly comfortable in the aero position when using my aero bars. It is important to note that high-speed turning decents without the nose of a standard saddle for balance was interesting, but I had no big issues at up to 40mph. There will be a learning-curve and the more you ride it, the more comfort with balance will evolve. Riding without your hands will more or less become a thing of the past with this saddle due to the missing nose which would normally be used for balance. Additionally, high-speed technical decents should be approached with a little caution until the lack of a nose is fully understood and adapted to. I do like the flexing/spring action of the Spiderflex saddle while peddling and over bumpy roads...reminded me a little of an old TT bike I used to have; a Softride Time Trial (TT). The Spiderflex saddle definitely relieved ANY pressure in the perineum region, but that was not a super big problem with me in the first place. I wanted to distribute the seat pressure over a bigger area to help battle chaffing over long ride distances...at least that was the main objective.
I was still playing around with fit on the Spiderflex for a couple weeks prior to the race until I found the perfect position. It must be understood that I was dealing with a complicated fit scenario because I needed to be very comfortable in an aero position (where I spent most of my time) while still being able to sit-up and climb, rest or eat. I found a slightly lower seat position helped with comfort and balance on this particular saddle. Because I set it to make physical contact with me just forward of the crease between the lower margin of my buttocks and my leg, a steeper forward ("nose" down) angle was necessary than a standard saddle. Also, a slightly forward in the rails position, just a couple of centimeters, was helpful. By lowering the saddle a bit from my normal position and putting another spacer stack below my stem to raise it and the handle bars, kept me from sliding forward off the seat. Remember, because there is no nose for side to side balance or forward slide, seat tilt was critical during fit. Too much "nose" down tilt and I found myself sliding forwards off the saddle, too much "nose" up tilt and it caused chaffing and the angle between my anatomy and the seat was not matched up nice and flat. I also quickly found on longer rides (50 miles or more) that standard cycling shorts were not very compatible with this saddle.
Most standard cycling shorts with a chamois pad place the padding outer seam right in the middle of the Spiderflex pad. For me, that added an additional chaffing point (not good). I found that short-tights with no pad were far more comfortable when using the Spiderflex saddle than using standard cycling shorts with a pad. All my preparations for the Furnace 508 came to fruition after careful fit, adjustment, and experimentation. After a few weeks of riding the Spiderflex saddle I was very happy with my fit and comfort on the seat. I knew I would definitely be using it during the race after the 3 weeks of evaluation prior to the event. My initial plan was to rotate between my standard long-distance race saddle and the Spiderflex. When the "tail" hit the saddle, though, I ended up using the saddle exclusively in the latter stages of the event! There is no greater evaluation and endorsement of the Spiderflex's comfort than this simple statement, "the Spiderflex was my go-to seat after the 350 mile point in this 508 mile race!" I definitely attribute my use of the Spiderflex saddle to my success at the Furnace Creek 508. It was a critical part of my assault on one of the most serious cycling events in North America. After this baptism by fire, I am definitely prepared to endorse the Spiderflex on its comfort and health benefits…you guys rock!!
Yours in Sport,
Mike "Frostbite SEAL" Benedict
Kurt
My saddles are holding up amazingly! Lots of miles on both of them and they are showing signs of age and wear but far from worn out. I even went down once and got a chunk ripped out of the side of one of them but itls still holding tough. (I can't even notice it) That rubber molding you use has proven itself as some tough shit! I've been Mountain Biking, Road Racing, Commuting and Touring on these saddles for years now and I've never bent, broken or mangled one in any way (other than that little chunk). Bikes and many parts have come and gone but the Spiderflex saddles have stood the test of time and abuse!
I don't know if I told you this before but when I'm in the starting line for a race I can hear other racers snickering about my saddle but they won't say anything to me. But after I win the race they'll come up to me and ask me about it, and say they probably need to get one. Bike Geeks, Man?
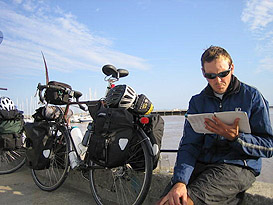
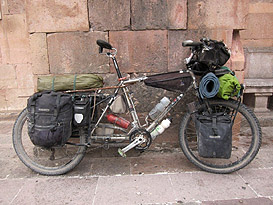
Road Bike -- Touring Bike / Extended Frame
I hit the road again and am planning to circumnavigate the planet this time. The plan is roughly to ride from California to Canada, down the continental divide trail to Mexico. I'll keep heading south to the bottom of South America and then try to catch a boat to South Africa and ride north to Asia and then east till I get back to California. I plan on stopping along the way for volunteer work doing bicycle advocacy and building bikes for children in developing countries. We'll see how it goes. You can add my blog site to the list of spider riders if you want? It's: pocket-thunder.blogspot.com
Take care, Kurt
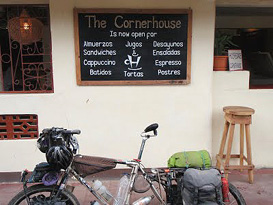
Kurt update spring 2011 - now touring Panama!
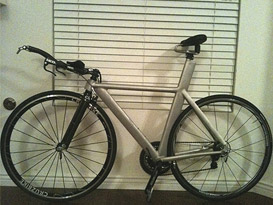 Danny Finneran / Spiderflex REC Set-Up / Time Trial Bike
(Click Here to Read Danny Finneran's Story!)
My TT bike set up is with the saddle angle down, rails parallel with the ground. I raised the handlebar height compared to my old fit, and then I tilted the aerobars up about 20 degrees (Like the old Floyd Landis position). As for my road bike, about the same thing ..... saddle tilted down, raising the handlebars and using wide handle bars (to reduce the pressure on the hands).
NOTE - Widening the handlebars will help to reduce pressure on the hands.
This can be achieved in several ways, or in combination:
- Winged handlebars
- Oversized handlebars
For any handlebar, you can place the cables on either side of the handlebar when you wrap your bars. If you draw a line through the middle of the cables and handlebar, it should be parrallel to the ground. It should look something like this -o- The dash "-" represent the cables and the "o" represents the handlebar.
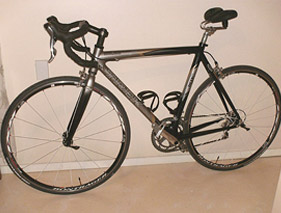
Michael Sykes / Spiderflex REC Set-Up / TREK Madone 5.2 SL / OCLV 110 Carbon Frame
I learned after a third bout of UTIs in rapid succession that something had to change quickly in the saddle department. A number enquiries led me to the Spiderflex saddle as a potential solution to that ongoing health issue.
Firstly. I acquired a new seat post, one that clamped the seat rails from the top down instead from the sides. This added stability. I moved the seat on the rails to what looked to be the most comfortable position with the rails parallel with the ground. I took the bike on the road with a set of allen keys and tweaked the seat until I felt comfortable with it. I also moved the handle bars up a few degrees, this helped with shoulder and arm comfort.
The bottom line is: With this saddle there are no pressure points on the peritoneal area and thus no pain or numbness. The more I ride this new system, the more comfortable it is.
One note of caution, on steep descents it is important that you are well back in the saddle to keep your weight correctly distributed in order to avoid wheel wobble.
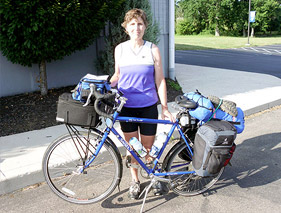
Jacquie Pisauro / Spiderflex REC Set-Up
This is a Surly Long Haul Trucker touring bike so the handlebar is already a little higher and the headtube is a little longer than on typical road bikes.
Before we put on the Spiderflex seat, the bars had already been raised with 6 10-mm spacers.
The main adjustment that the guy at the bike shop did when he checked for proper and comfortable position of the Spiderflex seat was to move the seat down some.
I gave him your emails and the info about adjusting the seat. That is the factory stem and he says that it has not been cut and that it is in the "up" position.
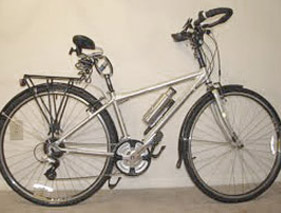
Marin Larkspur 2007 with trekking/butterfly handlebars, Cane Creek Thudbuster LT suspension seat post and Spiderflex seat
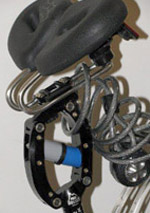
Seat Post Clamps
The Spiderflex REC has heavy duty 8mm rails, compared to just 7mm rails on most seats, but no modifications are needed. The separation distance between the rails (center to center) is 43mm, and is standard width for seat post clamps.
The Spiderflex saddle attaches to your existing seat post clamp, and will fit the newer style "micro-adjustable" post clamp, or the older style "U" clamp.
The clamp on your seat post should look similar to one of these clamp styles in order to fit it on.
Micro-Adjustable Post Clamp
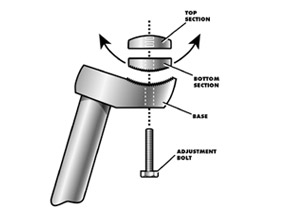
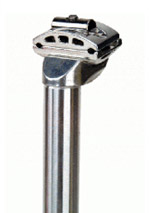
The newer "micro-adjustable"posts are carried by all the bike shops. If your existing seat post has the older style "U" clamp, and you decide to up-grade to a "micro-adjustable" post, (these posts are easier to install and make adjustments on a saddle) your existing seat post will have a size # stamped on it. This # will give you the proper replacement size.
U-Clamp
When installing a saddle on to a U clamp post system, always remove the clamp parts and set them down in the order they were removed. This insures the correct order for re-assembly. Tighten securely after assembly.

